Using ImageCraft C
 In opposite to the Open Source Compiler AVR-GCC, ImageCraft's commercial compiler
ICCAVR comes with its own IDE (Integrated Development Environment). In addition,
ICCAVR offers more debugging options than AVR-GCC when used with AVR Studio.
This page will show you step by step, how to use this environment to build and
debug a webserver sample.
Nut/OS libraries for AVR-GCC and ICCAVR are based on the same source code. However, most application samples had been rewritten for ICCAVR, because this compiler doesn't allow ROM based string literals as function arguments.
A full featured demo version of ICCAVR can be downloaded from the
ImageCraft website.
For debugging, you need additional hardware, a so called ICE (In Circuit Emulator). It allows debugging of applications directly on the target hardware such as the Ethernut Board. In this tutorial we will use the ATJTAGICE, which is available either from your Ethernut or Atmel distributor. Note, that the ATJTAGICE can't be used with an ATmega103, because this CPU has no JTAG interface.
Step 1: Start the ImageCraft IDE
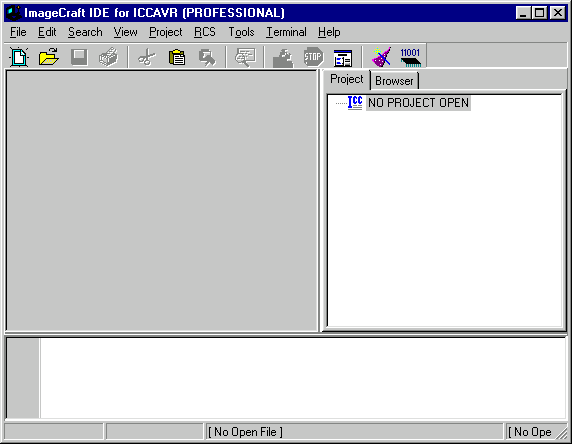
When started for the first time, the IDE will appear without any opened project.
Step 2: Open the Webserver Project
Select Open... from the project menu and load the project file httpserv.prj, which is located in the subdirectory appicc/httpd.
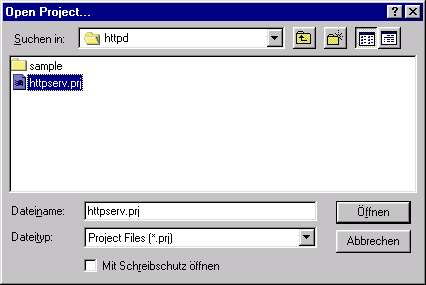
The prepared webserver project contains most required settings. Later on you will create your own projects and refer to the following steps to configure it. Do not forget to include the Nut/OS file init.c in your list of source files. It is located in the subdirectory os.
Step 3: Directory Path Configuration
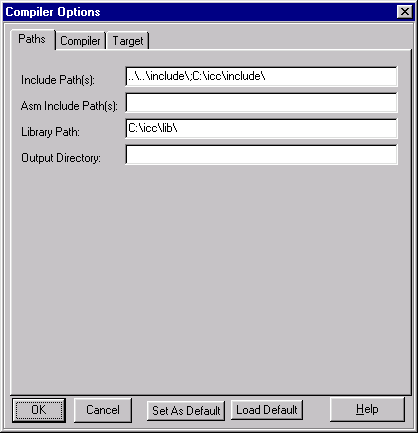
Select Options... from the project menu and click on the tab named Paths. Note, that an additional path ..\..\include\ has been added to the Include Path(s), so that ICCAVR can find the Nut/OS include files.
It's not possible, to add additional library paths. Therefore you need to copy the Nut/OS libraries to the ICCAVR library path. There are two sets of Nut/OS libraries. One set is located in the Nut/OS subdirectory lib/mega and is used for the ATmega103 CPU. The other set can be found in subdirectory lib/enhanced and has been build for the ATmega128 CPU.
Choose the proper library set and copy the following files to the ICCAVR library
path:
libnutdev.a (Device driver library)
libnutfs.a (File system library)
libnutnet.a (Network library)
libnutos.a (RTOS library)
libnutpro.a (Protocol library)
The object file init.o shouldn't be copied. Instead, the source code of this module has been added to the list of project source files.
Step 4: Configure Compiler Options
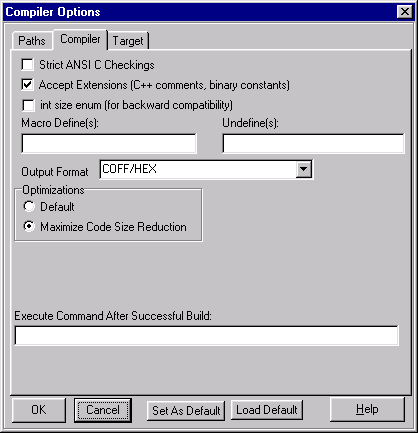
Now click on the Compiler tab and verify, that all options are correctly set. Code size reduction is optional and only available in the professional compiler version.
Add __AVR_ATmega128__ to the macro definitions, if you are compiling for the ATmega128 CPU.
Due to a bug, the overall code size is limited to 64 kByte. This means, that the upper 64 kByte are not available for application code. Right now, it's not known wether this is a compiler bug or a Nut/OS bug. The limit applies to the original code size, even if the code size reductions shrinks its size below this limit. The original webserver code was beyond this limit. In order to get it running, the Macromedia flash demo has been removed from the file system.
Step 5: Configure Target Options
Click on the Target tab. Again make sure, that the right options are set. Specifically check the device for ATmega103 or ATmega128. The following Additional Libs are required for the webserver project: nutpro nutnet nutfs nutos nutdev.
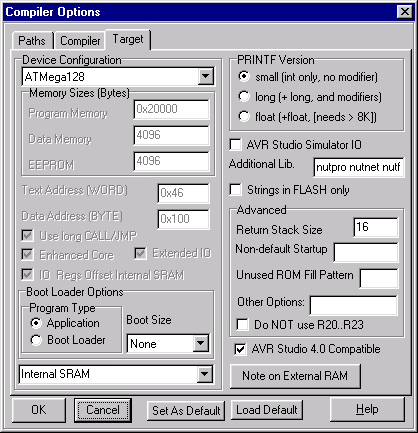
Finally press OK to close the Compiler Option Window.
Step 6: Edit IP Settings
By default Nut/OS uses DHCP to automatically setup its TCP/IP configuration. Even without DHCP, typical applications will store these settings in the on-chip EEPROM. In order not to overload this tutorial, we use hardcoded addresses.
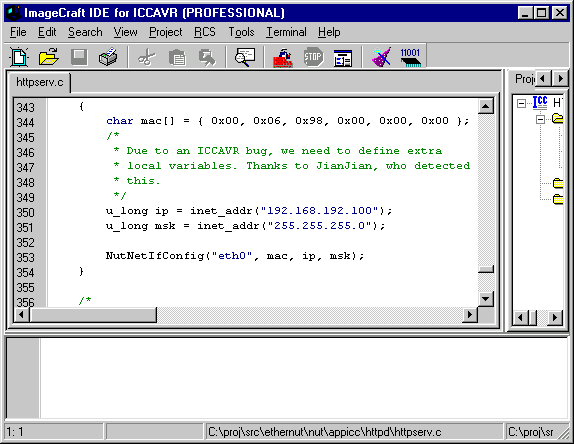
Open the file httpserv.c in the integrated editor. Consult your ICCAVR manual on how to do this and how to use the editor. It is required to change the IP address and may be required to change the IP mask to fit your network environment. Otherwise your web browser won't be able to talk to your Ethernut Board later on. If unsure what to do, ask your local network administrator.
It's also a good idea to change the MAC Address to the one, which you received with your Ethernut Board. For self build boards or other boards without MAC address, you need at least to make sure, that the address is unique in your local network.
Step 7: Build the Project
When selecting Make Project from the project menu, ICCAVR will compile and link the webserver code. Check, that no errors occured during this process. Refer to the ICCAVR manual for further details.
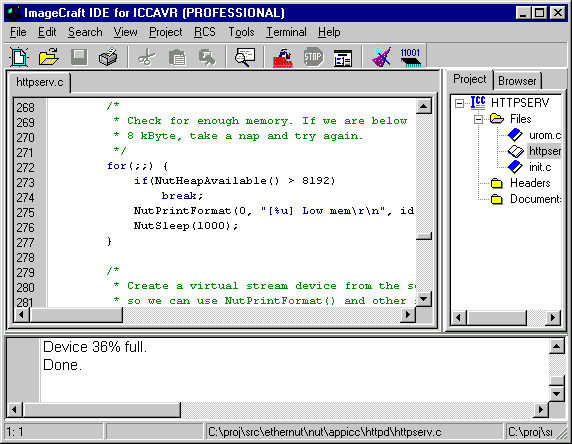
As a result of the this step, ICCAVR should have created two files. One is named httpserv.hex and contains the binary code in Intel Hex Format. The second file, httpserv.cof, can be loaded into the AVR Studio Debugger and contains the binary code plus additional debugging information.
Step 8: Programm the Ethernut Board
Unless debugging is required, you can directly use the ICCAVR IDE to program the ATmega flash memory with an ISP Adapter.
If not already done, you should now connect the ISP Adapter to the Ethernut Board and the PC printer port connector. While doing this, you must have switched off the Ethernut's power supply. Otherwise you risk to destroy the printer interface on your PC.
Switch the Ethernut power supply back on and select In System Programmer from the Tools menu. Then select the file httpserv.hex in the file dialog after clicking on the Browse button. Now press the button labeled Program FLASH/EEPROM to start flash programming. This takes some seconds.
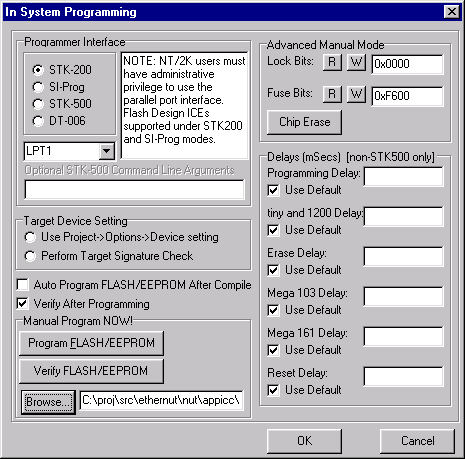
Finally press the OK button to close the In System Programming window. Your
Ethernut Board will immediately start the webserver application, waiting
for a web browser to connect.
Step 9: Connect the Embedded Webserver
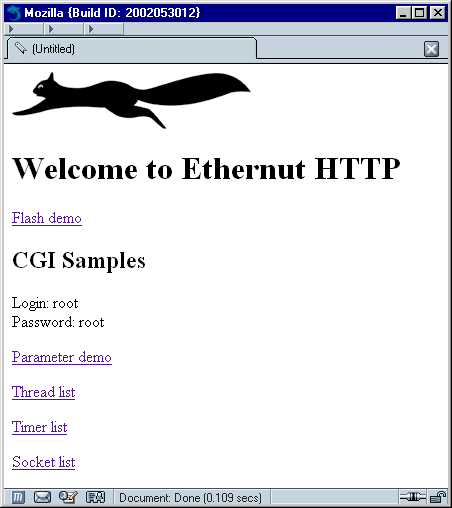
Make sure, that the Ethernut Board is connected to your local network and start a web browser on your PC. The URL to request is the IP address, which has been hardcoded in the source code. When everything went well, you will see the main index page of the Ethernut webserver.
Step 10: Connect ATJTAGICE And Start AVR Studio
Switch off the Ethernut power supply and remove the ISP Adapter. Connect the ATJTAGICE as shown here. Power up the Ethernut Board and the ATJTAGICE and start the AVR Studio Debugger.
Step 11: Load a Coff File
Select Open File... from the File menu to load webserv.cof, which has been created in step 7.
Three screens will appear, one after the other. Verify the three images below to make sure to select the right options.
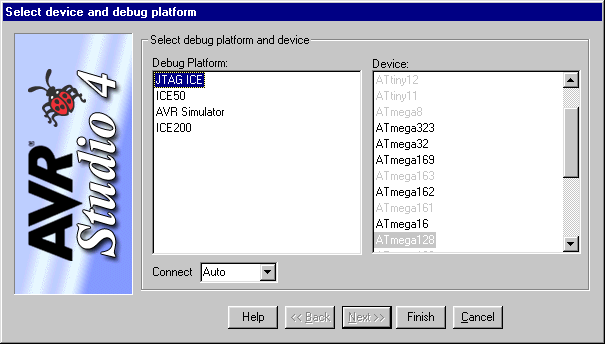
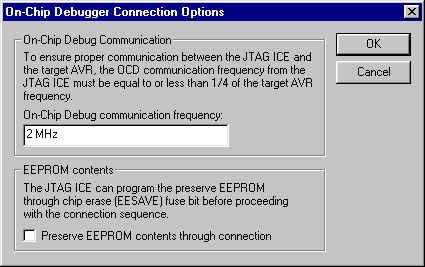
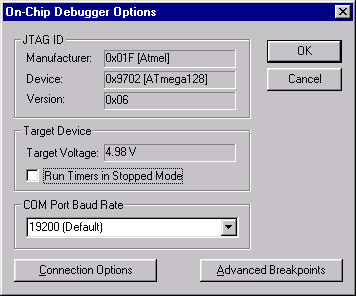
Finally the coff file is loaded into the debugger and into the Ethernut board through the JTAG interface. Often it is required to stop the program and reset the debugger by selecting Break and Reset from the debug menu.
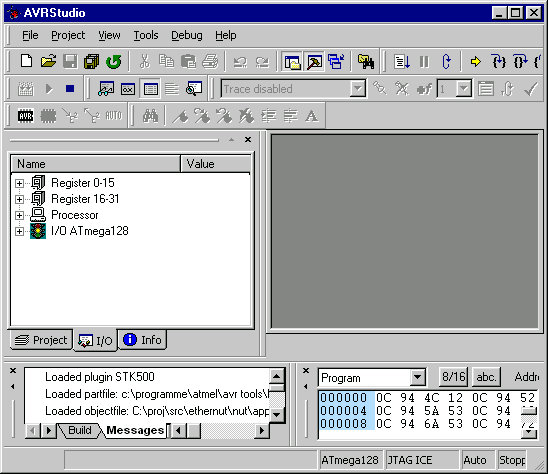
If you are using AVR-GCC, you need to load the Obj file instead of the Coff file.
Step 12: Set a Breakpoint
Click on the project tab of the left window frame and double-click on the source file httpserv.c to open it. Next click with the right mouse button on the source code line, which contains the call to NutNetIfConfig and select Toggle Breakpoint from the pop-up menu. A dark red dot will appear at the left side of the source code line.
Now select Run from the debug menu. This will start the webserver application in the Ethernut Board. As soon as the code reaches the line with the breakpoint, a yellow arrow will appear, indicating the next source code line to be executed.
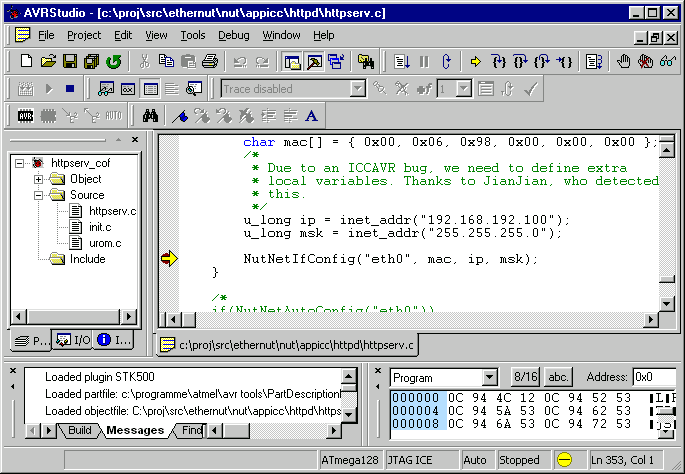
Step 13: Watch Variables
When program execution has stopped, either at a breakpoint or because Break has been selected in the debug menu, you can examine the contents of C variables. Select Watch in the view menu and click with the right mouse button in watch window to add the name of the variable.
In our example we view the contents of the variables named ip, msk and mac. The first two contain ip addresses in network byte order, which differs from the byte order used by AVR CPUs. When switching to hexadecimal display, the value 255.255.255.0 of msk will appear as 0x00FFFFFF. Of course it is not only possible to view, but also to modify the variable contents.
Viewing and modifying the contents of arrays and structures is quite limited, but you can always use the memory dump window for this task. ImageCraft is currently working on this.
Note, that accessing source code variables is only available with ICCAVR. AVR Studio is still not able to load Elf files produced by AVR-GCC. Also Coff files created by elf2coff will not work.
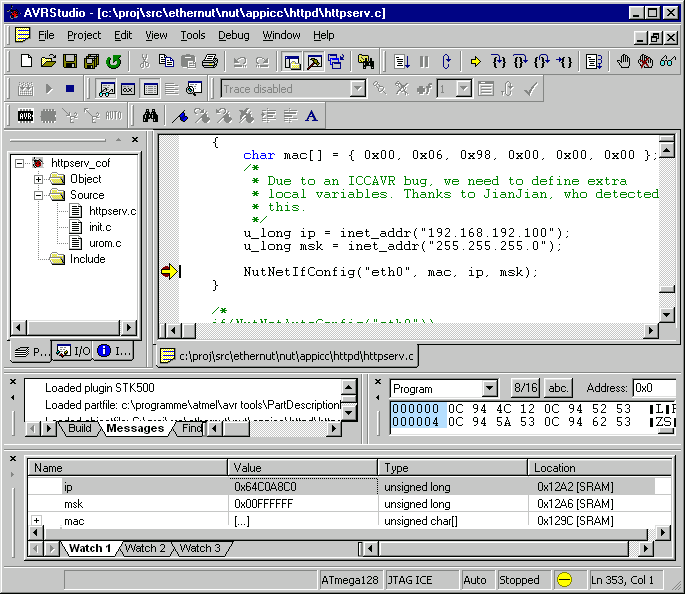
Step 14: Continue Execution
Place the cursor on the next source code line containing a call to NutPrintString and select Run to Cursor from the debug menu. The code will execute the NutNetIfConfig call. This will lit the yellow link LED on the Ethernut Board, if connected to a network.
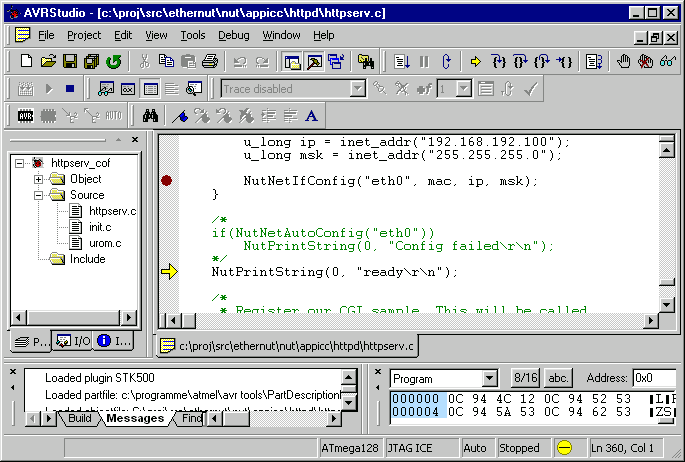
For more debugging options check the AVR Studio User's Guide.